
Once you have a domain name, assigning it to your Bluehost account makes it active and connects it to your hosting plan. This guide covers all three verification methods, the post-assignment setup steps, and the most common reasons the domain doesn’t work right after you click Assign.
Before You Start
Bluehost can verify and assign a domain in three ways: nameserver update, A record update, or HTML file upload. The method you use determines how quickly DNS resolves and how much control you keep over the domain’s DNS settings.
If your domain is registered elsewhere (such as GoDaddy, Namecheap, or Google Domains) and you need to update the nameservers first, see our guide on how to change nameservers on Bluehost. Bluehost’s nameservers are ns1.bluehost.com and ns2.bluehost.com. If the domain is not yet in your Bluehost account at all, follow how to add a domain to Bluehost first, then return here to assign it.
Primary Domain vs Addon Domain
It helps to know which type of domain assignment you are doing before you start:
- Primary domain - The main domain tied to your hosting account. Every Bluehost account has one.
- Addon domain - An additional domain on the same account, each capable of hosting a separate website.
- Parked domain - A domain that points to the same site as your primary domain, typically used for domain variations or brand protection.
The steps below cover assigning an addon domain. If you need to change your primary domain, see the guide on how to change your primary domain on Bluehost.
Nameserver vs A Record vs HTML: Which Method to Use
The verification method you choose affects your DNS setup going forward:
- Nameserver (recommended for most users) - Point your domain’s nameservers to ns1.bluehost.com and ns2.bluehost.com at your registrar. Bluehost then manages all DNS for the domain (A records, MX records, CNAME records). This is the simplest ongoing setup. Propagation takes up to 48 hours, but typically resolves in 2-4 hours.
- A record (for users who want to keep DNS elsewhere) - Your domain stays pointed at your existing nameservers, but the A record is updated to your Bluehost server IP address. You find your Bluehost server IP inside cPanel under “Server Information.” This keeps your DNS with your registrar or another DNS provider like Cloudflare, which is useful if you have existing MX records for email that you don’t want to move.
- HTML file (domain ownership verification) - Bluehost gives you a small HTML file to upload to your web root. This proves you control the domain without requiring a DNS change first. Less common, used mainly when you’re migrating and need to assign before pointing DNS.
If you have no existing email setup on the domain and want the simplest experience, use the nameserver method. If you run email on the domain with a provider like Google Workspace and do not want to disturb MX records, use the A record method instead.
Steps to Assign a Domain to Your Bluehost Account
Step 1 - Log In to Bluehost
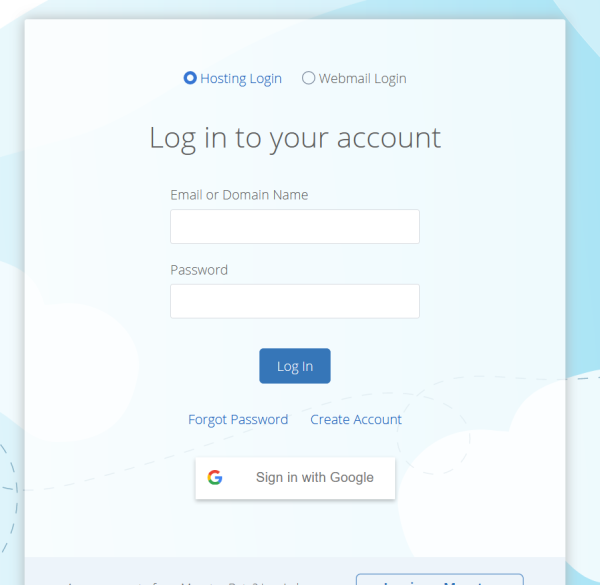
Go to bluehost.com and log in with your email address and password. This takes you to your Bluehost dashboard.
Step 2 - Open the Domains Section
In the left-hand menu (Bluerock dashboard) or the top navigation (Legacy dashboard), click Domains. This opens the domain management area where you can view, add, and modify domains on your account.
Step 3 - Click Assign
From the Domains submenu, select Assign. Enter the domain name you want to add and choose your verification method:
- Nameserver - The domain’s nameservers must already point to Bluehost (ns1.bluehost.com and ns2.bluehost.com).
- A Record - The domain’s A record must point to your Bluehost server’s IP address.
- HTML page - Upload a small verification file to prove domain ownership.
Select the method that matches how you have set up your domain. If you updated the nameservers to Bluehost’s nameservers, choose Nameserver.
Step 4 - Confirm and Add the Domain
After selecting the verification method, click Add Domain. Bluehost will verify the domain and add it to your account. Once complete, the domain will appear in the Domains tab.
Step 5 - Post-Assignment Setup
Once the domain is assigned, set up the following depending on how you plan to use it:
- Install WordPress: Go to My Sites > Create Site and point the new WordPress installation to the assigned domain.
- Check DNS propagation: If you recently updated nameservers, allow up to 48 hours. Most updates complete within a few hours.
- Set up email: Create email accounts for the new domain through the Email section in cPanel (only applies if you used the nameserver method).
- Activate SSL: Bluehost provides free SSL through Let’s Encrypt. Activate it from the Security section of your dashboard after the domain is pointing correctly.
What Bluehost Does After You Click Assign
Behind the scenes, once Bluehost verifies your domain, it creates a dedicated directory for the domain in your account’s file system (under public_html), sets up a DNS zone for the domain in its nameservers, and links the domain to your hosting account so WordPress installations can be pointed to it. If you chose the nameserver method, Bluehost also imports default DNS records for the domain, including the A record pointing to your server IP.
You do not need to do anything manually to trigger these steps. They happen automatically within a minute or two of Bluehost confirming the assignment.
How Long Does Domain Assignment Take?
The assignment process inside the Bluehost dashboard takes only a minute or two. The delay is in DNS propagation. If your domain nameservers were already pointing to Bluehost before you started, the domain will be active almost immediately. If you just updated the nameservers, expect up to 48 hours before the change is fully live globally, though most regions update within a few hours.
What to Do If the Domain Doesn’t Work After Assignment
Most problems after domain assignment fall into one of four categories:
DNS Not Yet Propagated
If you just changed nameservers or an A record, the global DNS network takes time to update. Check propagation status at a tool like whatsmydns.net by looking up your domain’s A record. If most locations show your old IP, propagation is still in progress. Wait a few more hours and re-check.
Wrong Verification Method
If your nameservers are still pointing to your old registrar or host, but you told Bluehost to verify by nameserver, the assignment will fail. Log back into Bluehost, open the domain, and either switch to A record verification or wait until the nameserver change completes.
WordPress Not Installed on the New Domain
Assigning a domain to Bluehost creates the directory and DNS zone, but does not automatically install WordPress on it. If the domain resolves but shows a blank page or a Bluehost placeholder, you need to go to My Sites > Create Site and install WordPress pointing to the new domain.
SSL Certificate Not Issued Yet
SSL certificates are issued after the domain is pointing correctly. If you see a security warning in your browser after assignment, wait 10-15 minutes for Let’s Encrypt to provision the certificate. If it does not resolve, go to the Security section in your Bluehost dashboard and manually trigger the SSL activation.
Final Word: Assigning a Domain to Bluehost
Assigning a domain to your Bluehost account only takes a few minutes once the DNS is configured correctly. Use the nameserver method for the cleanest setup. Use the A record method if you have email MX records elsewhere that you need to keep intact. The most common delay after assignment is DNS propagation, not anything inside the Bluehost interface itself. If you are moving a WordPress site from another host at the same time, check whether you qualify for Bluehost’s free migration service before manually uploading files.