Cloudways includes both automatic and manual backup options for every application on your server. This guide covers how to enable local backups, take an on-demand backup, set a backup schedule, and restore from a backup if something goes wrong. For server-level snapshots that cover all applications at once, see our guide on how to back up your server on Cloudways.
Cloudways Backup Types
Cloudways handles application backups in three ways:
- On-demand backup: A manual backup you trigger at any time. Creates a snapshot of the application that can be restored later. Recommended before any significant change such as a plugin update, theme switch, or site migration.
- Scheduled backup: An automatic backup that runs on a set frequency (hourly, daily, weekly, or custom). Retained for a set number of days depending on your retention setting.
- SafeSync off-site backup: An optional add-on that sends backups to an off-site location (Amazon S3 or another storage provider), separate from the local backup on your server. Useful for disaster recovery.
The steps below cover enabling local backups and taking on-demand backups, which are available on all Cloudways plans.
Quick Answer: How to Add an On-Demand Backup to Cloudways
In your Cloudways dashboard, go to Servers → your server → Backups. Enable Local Backup if it is not already on, then click Take Backup Now under the On-Demand Backup section. The backup starts immediately and completes in under two minutes for most WordPress sites. The full step-by-step walkthrough with screenshots starts at Step 1 below.
Step 1 - Log In
Log into your Cloudways account at platform.cloudways.com.
Step 2 - Open Your Server
In the top navigation, click Servers and select the server that hosts the application you want to back up.
Step 3 - Backups
Inside the server detail page, click Manage on the server, then select the Backups tab from the left-hand panel.
Step 4 - Enable Local Backup
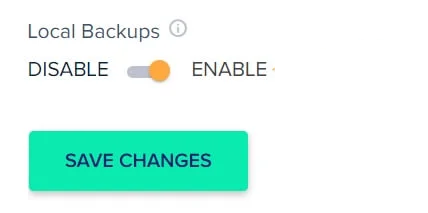
Find Local Backup and toggle it on. Save your changes. Local backup must be enabled before you can take on-demand backups or set a schedule.
Step 5 - Take an On-Demand Backup (Manual Backup)
Once local backup is enabled, click Take Backup Now under the On-Demand Backup section. The backup runs immediately and creates a restore point you can access from the same Backups tab.
Backups are stored in a local_backups folder on your server and can also be downloaded via SSH or SFTP if you need to keep a local copy.
How to Schedule Automatic Backups
In the Backups tab, find the Schedule Backup section. Set the frequency (hourly, daily, weekly, or a custom schedule) and the number of days to retain backups. Click Save. Cloudways will automatically create backups on that schedule from that point forward.
A daily backup with a 7-day retention period works well for most WordPress sites. For WooCommerce sites with daily orders, hourly or 6-hourly backups reduce the amount of data at risk between backup points.
Cloudways Backup vs WordPress Backup Plugins (UpdraftPlus, BackWPup)
Cloudways built-in backup handles most WordPress sites well, but some situations call for a combination of Cloudways and a plugin. Here is how they compare:
| Feature | Cloudways Built-In | WordPress Plugin (e.g. UpdraftPlus) |
|---|---|---|
| Backs up files and database | Yes, full application | Yes, configurable |
| One-click restore in dashboard | Yes | Yes (within plugin) |
| Send backup to S3/Dropbox/Google Drive | Via SafeSync add-on only | Built in (free and premium) |
| Works if server is destroyed | Only if SafeSync is enabled | Yes (backups stored off-server) |
| One-click download from dashboard | No (requires SFTP) | Yes |
| No plugin dependency | Yes | No |
| Cost | Free (local); SafeSync is paid | Free plan available; premium for remote storage |
When Cloudways built-in is enough: For most WordPress sites, enabling daily scheduled backups with a 14-day retention window covers almost all recovery scenarios. Cloudways backups are reliable, require no maintenance, and restore with one click from the dashboard.
When to add a plugin:
- Large media libraries (over 3 GB of uploads): Cloudways backups include all files, so a large uploads folder significantly increases backup size and restore time. Use UpdraftPlus to send just the uploads folder to S3 or Dropbox independently, and rely on Cloudways for the smaller database and configuration backup.
- Off-site redundancy without SafeSync cost: If you want backups stored away from the server but do not want to pay for SafeSync, a free UpdraftPlus account with Google Drive or Dropbox storage achieves the same off-site protection.
- Migration between hosts: Backup plugins like Duplicator or All-in-One WP Migration generate portable backup archives designed for moving sites. Cloudways backups are not easily portable to other hosts.
- Developer or staging workflows: Plugins that allow selective database table backup or partial restore (like WP Migrate DB) are useful when you only need to move specific data, not the full application.
For most Cloudways users, a daily Cloudways backup plus SafeSync for off-site storage covers all standard recovery needs without adding plugin overhead to the site.
How to Download a Cloudways Application Backup
Cloudways does not provide a one-click download button in the dashboard for application backups. To download a backup file locally, use SFTP or SSH:
- Find the backup location: Application backups are stored in
/home/master/applications/your-app-folder/backup/on the server. The folder name matches your application’s folder name as shown in Cloudways under Application Management → Application Settings. - Connect via SFTP: Use a client like FileZilla or Cyberduck. The SFTP credentials are in your Cloudways server under Server Management → Master Credentials. Connect as the master user on port 22.
- Download the backup archive: Navigate to the backup folder and download the .tar.gz archive file. Backup files are named with a timestamp so you can identify the most recent one.
- Alternatively, use SCP: From a terminal, run
scp master@your-server-ip:/home/master/applications/your-app-folder/backup/backup-file.tar.gz ./to copy the file to your local machine.
Cloudways Backup Retention: How Many Copies Are Kept?
Cloudways keeps backups for the number of days you set in the Schedule Backup section, up to a maximum that depends on your server plan. The default is 7 days. During setup, you configure both the frequency (how often a backup runs) and the retention period (how many days of backups to keep).
Key points on retention:
- Backups older than the retention window are automatically deleted.
- On-demand (manual) backups are stored separately and do not count toward your scheduled backup slots.
- If you take a manual backup before a risky change, it remains available even after the retention window rolls past it, until you delete it manually.
- SafeSync off-site backups have separate retention settings configured within the SafeSync add-on panel.
For most WordPress sites, a daily schedule with a 14-day retention window is a good baseline. This gives you two weeks of restore points without consuming excessive server storage.
How to Verify Your Cloudways Backup Completed
After triggering an on-demand or scheduled backup, verify that the backup file was actually created:
- In the Cloudways dashboard, open the Backups tab for your server.
- Under Local Backups, check that a new entry has appeared with a timestamp matching your expected backup time and a non-zero size.
- For extra confirmation, SFTP into
/home/master/applications/your-app/backup/and confirm a.tar.gzfile exists with a recent timestamp. - If no entry appears or the size is 0 KB, check disk usage under Server Management > Settings > Disk Usage. Insufficient disk space is the most common backup failure cause.
For critical sites, test a restore periodically. Restore a backup to a staging clone, confirm the site loads correctly, then delete the staging restore to confirm the backup is genuinely restorable, not just present.
Cloudways Backup Pricing: What Is Free?
Cloudways local backups (on-demand and scheduled) are included with every Cloudways subscription at no extra cost. Storage used by backups counts toward your server's total disk allocation, but there is no separate per-backup fee. SafeSync, the off-site backup add-on, is priced separately per GB. It is optional but recommended for disaster recovery where the server itself could be lost.
What Does a Cloudways Application Backup Include?
A Cloudways application backup captures everything needed to restore the application to its backed-up state:
- All application files: The entire public_html directory, including WordPress core, plugins, themes, uploads, and any custom files.
- The application’s database: A full MySQL dump of the database tied to that application, including all posts, settings, user data, and plugin tables.
- Application-level configuration: The .htaccess file, wp-config.php (with database credentials), and any application-specific server configuration files.
Note that server-level configuration (firewall rules, NGINX or Apache settings applied globally, cron jobs outside the application) is not included in an application backup. For full server coverage, see our guide on the guide on how to back up your server on Cloudways.
How to Restore from a Backup on Cloudways
To restore an application to a previous state:
- Go to the Backups tab on your server.
- Under Local Backups, find the backup you want to restore from : backups are listed by date and time.
- Click Restore next to the backup point you want.
- Confirm the restore. The application will be rolled back to that snapshot. The current state is overwritten, so make sure you take a fresh on-demand backup first if you need to preserve the current version.
What to Do If a Cloudways Backup Fails
Cloudways backup failures are rare but do happen. The most common causes are insufficient disk space on the server and a backup process timing out on large application directories. Here is how to diagnose and fix each:
Check Available Disk Space
A backup writes a compressed archive to the server before storing it. If the server is more than 80% full, the backup may fail mid-write. Check disk usage in Server Management > Settings & Packages > Disk Usage. If you are above 80%, free up space by:
- Deleting old on-demand backups you no longer need (in the Backups tab, click the delete icon next to each backup)
- Clearing the application error log and access log, which can grow large over time (in Application > Monitoring > Logs)
- Running a WordPress media library audit to remove orphaned images
- Scaling up server storage or upgrading to a larger server if disk usage is permanently high
Check the Backup Notification Email
Cloudways sends a failure notification to the account email if a scheduled backup fails. If you are not receiving these, check your account email preferences under Account Settings. Backup failure emails sometimes land in spam.
Try an On-Demand Backup First
If scheduled backups are failing but you need a restore point immediately, try taking an on-demand backup manually (Step 5 in this guide). If the on-demand backup also fails, it confirms the issue is environmental (disk space or server resources) rather than a scheduler problem.
Large Site Timeouts
Very large WordPress sites (typically over 5 GB of files) can cause backup operations to time out on entry-tier servers. Options:
- Use a plugin like UpdraftPlus to back up just the uploads directory to external storage (S3, Dropbox, Google Drive), then rely on Cloudways for the smaller application files and database
- Upgrade the server: larger servers have more I/O throughput, which speeds up archive creation
- Enable SafeSync: Cloudways off-site backup add-on uses a different transfer mechanism that is more tolerant of large file sets
Contact Cloudways Support
If none of the above resolves the issue, open a support chat in the Cloudways dashboard. Include the server name, application name, and approximate time of the failure. Cloudways can inspect server-side backup logs to identify the specific error.
Final Word: How to Back Up an Application on Cloudways
Application backups on Cloudways take under a minute to set up once local backup is enabled. Use on-demand backups before any significant change and set a daily scheduled backup as a baseline. Always take a backup before major changes like migrating a WordPress site to Cloudways. For added protection, the SafeSync add-on stores backups off-site so a server-level failure does not affect your backup copies.