
Hostinger ships with LiteSpeed servers and a pre-installed LiteSpeed Cache plugin, which already puts most WordPress sites ahead of stock shared hosting. The catch: the defaults are conservative, the hPanel toggles that actually move PageSpeed scores are spread across four different menus, and the most useful feature for logged-in WooCommerce or membership sites (Object Cache) is off by default. This guide walks through every Hostinger-specific lever, in the order they pay off, with the gotchas that catch most teams.
What This Guide Covers
Three things, in this order: (1) how the Hostinger LiteSpeed stack actually caches a request and why that matters for what you tune next, (2) the hPanel toggles that move numbers (PHP version, OPcache, Brotli, Object Cache, CDN), and (3) the boundary where Hostinger's shared plans stop scaling and you need to move to Business, Cloud, or off the platform entirely. For first-time setup or migration steps, start with the Hostinger setup and migration guide. For the full provider overview and pricing, see the Hostinger hosting guide. For the priority-ordered speed checklist across every hPanel toggle covered here, see how to speed up WordPress on Hostinger.
For sites with WooCommerce active or multiple logged-in editors, two additional optimizations often make a measurable difference: throttling the WordPress Heartbeat API (which fires admin-ajax.php every 15 to 60 seconds and adds CPU load on shared plans) and running Query Monitor to surface the specific database queries slowing your heaviest pages. Both techniques are covered step by step in the full WordPress speed guide for Hostinger.
Run a Performance Baseline Before You Change Anything
Optimization without a baseline is guessing. Before you toggle a single hPanel setting, capture three numbers from a tool like PageSpeed Insights or GTmetrix, run from a location near Hostinger's data centre you actually use:
The Three Numbers That Matter
- Time to First Byte (TTFB): under 500ms on an uncached request is your goal on a shared plan. If you start at 1,500ms, no caching plugin will fix it; the problem is upstream.
- Largest Contentful Paint (LCP): the headline Core Web Vital. Most Hostinger sites that "feel slow" are LCP-bound, not TTFB-bound.
- Total page weight: if your homepage is over 3MB, fix images and fonts first. Caching shaves milliseconds; deleting 2MB of unused JS shaves seconds.
How to Record a Clean Baseline
Run each test three times in incognito and take the median. Save the report URL or export the PDF. You will want to compare against it after every change. If you test in incognito but forget to clear the LSCWP cache first, you may be measuring a warm cached response rather than a fresh one. In the WordPress admin, go to LiteSpeed Cache > Toolbox > Purge All before capturing your baseline TTFB.
How the Hostinger LiteSpeed Stack Actually Caches
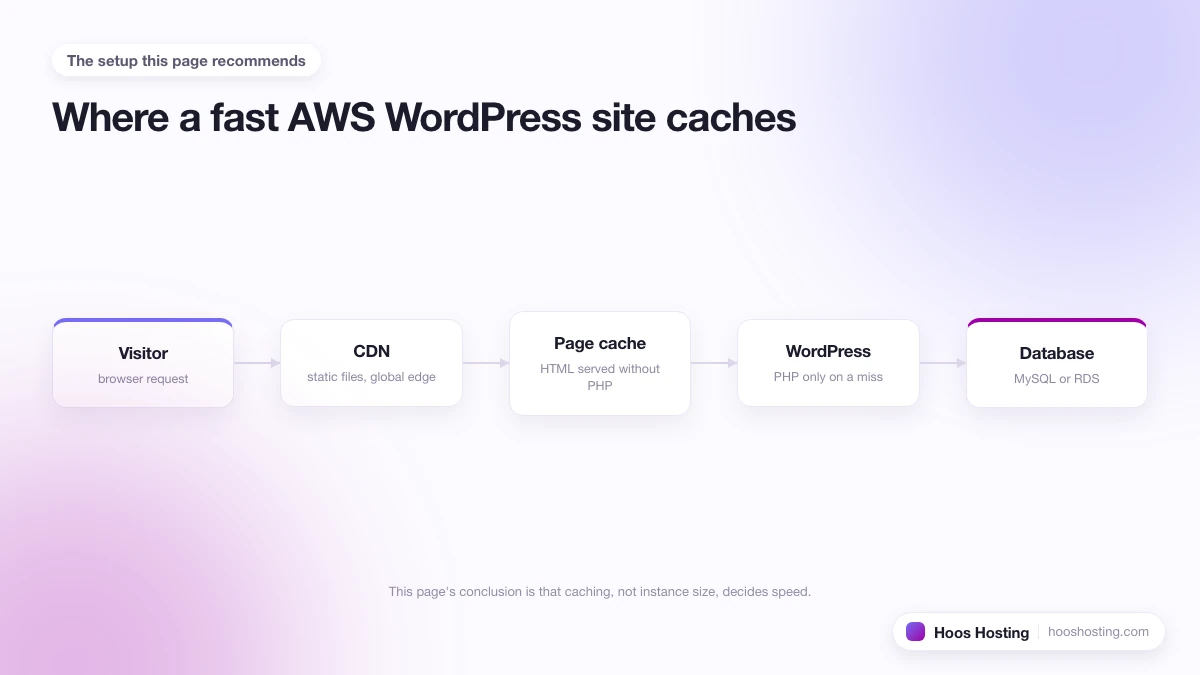
Hostinger runs LiteSpeed Web Server (LSWS) instead of Apache or Nginx, which is why the stack feels different from a typical cPanel host. LSWS has a built-in page cache that the LiteSpeed Cache (LSCWP) plugin controls from inside WordPress. If you have not switched it on yet, how to enable LiteSpeed Cache on Hostinger walks through the hPanel toggles and plugin settings step by step. There are three layers worth understanding:
Layer 1: Server-Level Page Cache
LSWS stores fully-rendered HTML for guest visitors. Hit ratios on cacheable pages run 90%+ once warmed. When a visitor lands on a cached page, the server skips PHP entirely and serves the stored HTML file directly from memory. This is why a well-configured Hostinger site can hit sub-100ms TTFB for returning visitors even on the entry-level Premium plan.
Layer 2: Browser Cache
LSCWP sets long expiry headers on static assets automatically. CSS, JS, and image files get cache-control headers that tell the browser to store them locally. Already on by default. The only situation where this needs attention is if you are serving assets from a subdomain or a CDN origin that overrides the headers.
Layer 3: Object Cache (LSMCD)
This layer caches database query results in memory using the LiteSpeed Memcached daemon. It is off by default and must be enabled from hPanel. This is where most speed gains live for sites with carts, member areas, or admin-heavy editors. A WooCommerce store without Object Cache hits the database on every page load for cart totals, session data, and product meta. With it enabled, those queries return from memory in microseconds instead of milliseconds.
Enable Object Cache via hPanel
Object Cache (LSMCD) is enabled per-site, not server-wide. In hPanel, open the site's WordPress > Overview panel and toggle Object Cache on; how to enable Object Cache on Hostinger walks through the exact hPanel path plus the LSCWP verification test and the Redis-conflict fix. Hostinger's own docs cite about a 10% response-time improvement on cached queries, but the real lift is for non-cacheable pages: WooCommerce checkout, BuddyPress feeds, LearnDash dashboards, anything that hits the database on every load.
Object Cache Compatibility Gotchas
Two issues trip teams up most often. First, LSCWP must be installed and active for the toggle to do anything. If you swapped to WP Rocket or W3 Total Cache, you lose Object Cache because the LSMCD daemon communicates with LSCWP's hooks. Second, certain plugins (especially older membership and forum plugins) write directly to the database without flushing the object cache, which can show stale data. Enable it on a staging environment first if your site runs any custom database-writing plugins, then test every user-facing flow before pushing to production.
Verifying Object Cache Is Working
After enabling in hPanel, check LiteSpeed Cache > Info in your WordPress admin. If LSMCD is active, the Object Cache row shows "Enabled" in green. If it shows "Disabled" despite toggling in hPanel, give it five minutes and refresh. Hostinger propagates the daemon-level change slightly behind the UI confirmation.
Turn On Hostinger CDN (and the Plan-Tier Catch)
Hostinger CDN is included on Business Web Hosting and above. On the Premium plan, the toggle is greyed out. If you are on Premium and want a CDN, your options are Cloudflare (free, manual setup) or QUIC.cloud (free tier, built to pair with LiteSpeed Cache).
Enabling Hostinger CDN on Business or Cloud Plans
Enable it in hPanel under Website > Performance > CDN. After enabling, purge the LiteSpeed cache once and re-test. Expect LCP improvements of 200ms to 600ms for visitors more than 1,000 km from your data centre. Visitors near the data centre will see little change; the CDN's value is geographic. If you are on a Cloud plan and serving an international audience, the CDN alone is often worth the plan upgrade from Premium. For the full activation sequence, the LiteSpeed Cache collision fix, and the curl check that confirms the edge is actually serving requests, see the dedicated how to enable Hostinger CDN on WordPress walkthrough.
What Hostinger CDN Does Not Cover
Hostinger CDN caches static assets (images, CSS, JS) at edge nodes, but it does not generate critical CSS, handle WebP conversion, or provide a WAF. For those features, you need QUIC.cloud or Cloudflare. Running Hostinger CDN and QUIC.cloud together is supported but requires care: make sure only one of them is rewriting image URLs to WebP, or you can end up with double-converted paths that break images.
QUIC.cloud as a Free Alternative
QUIC.cloud is the CDN built by the LiteSpeed team and integrates with LSCWP via a CNAME on your domain's DNS Zone Editor in hPanel. The free tier covers the first 20GB per month, which is enough for most small business sites. It also unlocks page-level optimisations LSCWP cannot do alone: critical CSS generation, image WebP conversion at the edge, and UCSS (Unique CSS) per page.
When to Use QUIC.cloud vs Cloudflare
Use QUIC.cloud if you want the tightest LiteSpeed integration with no manual configuration. The plugin handles CNAME setup guidance, and the LSCWP dashboard shows QUIC.cloud credits and purge controls without leaving WordPress. Use Cloudflare if you are already managing DNS there for multiple domains, need the Cloudflare WAF, or want to proxy email records alongside your CDN from a single interface. You can run Cloudflare in front of a Hostinger site with LSCWP active, but set Cloudflare's caching to "Bypass Cache on Cookie" for WooCommerce cookies, or Cloudflare will serve cached pages to logged-in shoppers.
PHP Version, OPcache, and Brotli
Three settings in hPanel Advanced > PHP Configuration that move numbers fast:
PHP Version: Upgrade to 8.2 or 8.3
The jump from PHP 7.4 to 8.x is typically a 15-25% throughput gain on real WordPress workloads. The gain comes from PHP 8's JIT compiler and internal optimisations to the object model and string handling. Before upgrading, run the Site Health check in WordPress admin and verify your theme and plugins report compatibility. Most themes released after 2022 and plugins with active maintenance are already PHP 8-ready. If you are running WooCommerce, check the WooCommerce System Status page for any PHP version warnings before switching. The actual switch in hPanel takes about 30 seconds, and you can roll back instantly if anything breaks.
OPcache: Always On
OPcache caches compiled PHP bytecode in memory so the server does not recompile the same file on every request. Enable it. There is no real downside on a production site. The only time OPcache causes trouble is on development environments where file changes do not immediately reflect in the running process; for production WordPress, this is not a concern because you deploy changes and then flush the cache anyway.
Brotli Compression: Better Than Gzip
Brotli compresses HTML, CSS, and JS assets at a higher ratio than Gzip, typically 15-25% smaller output for text-based files. Enable it. Browsers that do not support Brotli (essentially none you will encounter in 2024) fall back to Gzip automatically. While you are in PHP Extensions, disable XML-RPC if nothing on your site uses it. XML-RPC is a perennial brute-force target and disabling it removes one attack surface and one source of background load.
Image Optimization Beyond LSCWP Defaults
LSCWP's image optimisation runs through QUIC.cloud's queue and converts to WebP. It works, but it is a queue, which means new uploads can sit for an hour before being processed.
On-Upload Compression
For a site that publishes frequently, pair LSCWP with a local compressor (ShortPixel, Imagify, or Smush) that compresses on upload, then let LSCWP serve the WebP version once QUIC.cloud has cached it. ShortPixel's glossy compression setting hits a good balance for product photos; Imagify's aggressive setting is better for editorial images where photo quality is less critical. Both plugins hook into WordPress's media uploader and process files silently in the background after upload.
Reducing Unused Image Sizes
Set the upload size limit on your theme's registered image sizes. Many themes generate 6-10 image sizes per upload, most of which are never used in the template. Go to Settings > Media in WordPress and set the width and height of the Large and Medium sizes to match your actual content column width. Then audit theme-registered sizes in functions.php and remove any add_image_size() calls for sizes that are not rendered in templates. For existing uploads, run the Regenerate Thumbnails plugin once after trimming the list.
Lazy Loading and Preload
LSCWP handles lazy loading for images below the fold automatically. The one image that should never be lazy-loaded is the LCP image (usually the hero or the first product image). In LSCWP Page Optimization > Media, you can add a CSS selector to the "Exclude from Lazy Load" list. Preloading the LCP image via LSCWP's Critical CSS feature, or by adding a <link rel="preload"> tag in your theme header, typically cuts 150-400ms from LCP on image-heavy pages.
Database Cleanup via phpMyAdmin
Open hPanel Databases > phpMyAdmin for the site, then optimise tables from the SQL tab.
Using WP-Optimize for Scheduled Cleanup
A practical safer path: install WP-Optimize, set it to a monthly schedule, and let it delete post revisions, auto-drafts, transients, and spam comments on its own. Sites that have been running for two years can easily carry 200MB of revision bloat that slows every admin query. In WP-Optimize's settings, keep the last 5 revisions per post rather than deleting all revisions; the marginal storage cost is low and you will thank yourself the next time you need to roll back a content change.
Direct Table Optimisation via phpMyAdmin
For a one-time cleanup, open phpMyAdmin, select all tables, and choose "Optimize Table" from the dropdown. This reclaims fragmented storage and is particularly worthwhile on wp_options and wp_postmeta, which grow quickly on active WooCommerce or Elementor sites. The operation is non-destructive and takes under a minute on databases under 500MB. On larger databases, schedule it during low-traffic hours as it briefly locks the table during the operation.
WooCommerce Speed Tuning on Hostinger
A WooCommerce site on Hostinger has a different performance profile than a brochure site. Every visitor carries a session, cart cookies trigger cache bypasses, and checkout pages cannot be cached at all. The following settings are specific to WooCommerce on the LiteSpeed stack and are separate from the general optimisations above.
Cart and Checkout Exclusion Rules
LSCWP automatically excludes /cart, /checkout, and /my-account from the page cache when WooCommerce is detected, but it does so by checking for the woocommerce_items_in_cart cookie. If your theme or a plugin creates a custom mini-cart outside the standard WooCommerce cookie scope, cached pages can show incorrect cart counts to returning visitors. To be explicit, open LiteSpeed Cache > Cache > Excludes and manually list /cart, /checkout, /my-account, and any custom account or order-status pages your store uses. This prevents a scenario where a guest visitor gets served another user's cached account page.
Session Handling and PHP Session Storage
WooCommerce uses PHP sessions for guest carts. By default, these sessions are stored in the database as wp_woocommerce_sessions records, which grow without bounds on high-traffic stores. In hPanel's PHP Configuration, the session save path defaults to the filesystem, which is slightly faster than database sessions for short-lived guest carts. If you are seeing slow admin queries and your wp_woocommerce_sessions table is over 100MB, run the WooCommerce built-in cleanup from WooCommerce > Status > Tools > Clear customer sessions and schedule it monthly via WP-Cron or a server-side cron job in hPanel.
Product Image Sizes for WooCommerce
WooCommerce registers its own image sizes: woocommerce_thumbnail, woocommerce_single, and woocommerce_gallery_thumbnail. You can adjust the pixel dimensions in WooCommerce > Settings > Products > Display. For most themes, a woocommerce_thumbnail of 300x300 is sufficient for category pages; many stores ship with 600x600 as the default, doubling the file size for no visible quality gain at thumbnail scale. After adjusting, run Regenerate Thumbnails to reprocess existing product images to the new size.
WooCommerce-Specific Database Optimisation
Two WooCommerce tables deserve specific attention beyond general database cleanup. First, wp_wc_order_stats and the related wp_wc_order_product_lookups tables can run into index fragmentation on stores with more than 10,000 orders. Optimise these monthly via phpMyAdmin or WP-Optimize. Second, wp_actionscheduler_actions fills up on stores using WooCommerce Subscriptions, WooCommerce Payments, or any plugin that hooks into WooCommerce's Action Scheduler. Old completed and failed actions accumulate here and are not cleaned up automatically. In WooCommerce > Status > Scheduled Actions, filter by "Complete" and delete records older than 30 days. Some stores carry millions of rows in this table and clearing it cuts admin query times noticeably.
How to Track Your Progress Over Time
Running one benchmark and moving on is not optimization; it is a guess. A proper tracking cadence tells you which changes moved the needle and whether gains are holding as your site grows. The approach differs slightly depending on the type of site you are running.
Scheduling Regular PageSpeed Tests
GTmetrix's free plan supports one scheduled monitoring URL, which runs a test daily and emails you if the grade drops below a threshold you set. Set it to your homepage and your most important product or landing page. Google Search Console's Core Web Vitals report updates monthly with field data from real Chrome users, which is the number Google actually uses for ranking. Cross-reference your lab results (GTmetrix, PageSpeed Insights) with the field data. A page that looks fast in lab conditions but shows "Poor" in Core Web Vitals usually has a render-blocking resource that lab tools do not trigger because they do not replicate real user conditions like slow-loading third-party scripts.
What Benchmarks Mean for Different Site Types
The thresholds that matter vary by what your site does. For a content or affiliate site, a mobile LCP under 2.5 seconds and TTFB under 600ms are realistic targets on Hostinger Business. For a WooCommerce store, the product page and checkout TTFB matter more than the homepage because those are the pages where purchase decisions happen. A store homepage served from full-page cache will score well on any benchmark, but a checkout page that is genuinely uncached needs a TTFB under 1 second to avoid cart abandonment. Run GTmetrix on your checkout URL specifically, not just your homepage, and do it with the WooCommerce cookie present so the test bypasses the cache as a real shopper would.
Using GTmetrix Monitoring Effectively
GTmetrix's monitoring runs from a fixed location, so pick the location closest to your primary audience. If most of your traffic is in the US and your Hostinger data centre is in the US East cluster, select New York or Dallas as the GTmetrix test location. Running from London against a US-hosted site will inflate your LCP numbers and give you a distorted picture. Set up a separate monitoring slot for your highest-converting page (a product page or a key landing page) alongside the homepage. The homepage is often over-optimised; it is the interior pages that slip.
When to Run Tests After Changes
Run your test suite immediately after enabling any caching change, then again 24 hours later once the CDN or QUIC.cloud edge cache has warmed. Some improvements (like QUIC.cloud critical CSS generation) take a few hours to propagate across all pages because the optimization queue processes pages on demand, not all at once. If you see a temporary dip after enabling a new cache layer, that is normal: the first uncached request while the edge warms is slower than usual. Check again the following day before concluding a setting made things worse.
When Hostinger Isn't Fast Enough
There is a real ceiling on shared LSWS plans. If your TTFB stays above 1 second after every toggle in this guide, and your tests are running on a warm cache, the bottleneck is CPU and I/O contention with other tenants on your server. Three escalation paths:
- Upgrade to Business Web Hosting for the Hostinger CDN, more CPU, and Object Cache headroom. Reasonable for a busy WooCommerce site under 50,000 monthly visitors.
- Move to Hostinger Cloud Hosting for dedicated resources. Worth it if your peak concurrent users are in the hundreds.
- Move off Hostinger to a managed WordPress host. Read the Hostinger review for an honest read on where the limits are, then consider Cloudways for VPS-grade performance at a similar price point, or Kinsta for a fully-managed alternative.
If you are not at the ceiling yet but planning ahead, the migrate WordPress to Hostinger guide covers what a clean cutover looks like, and the same DNS-cutover pattern works in reverse if you ever leave.
Common Cache and CDN Gotchas
Three failures that happen on Hostinger more than people admit:
- Two caching plugins active at once. If you installed WP Rocket on top of LSCWP, disable one. Two cache plugins serving the same page is the fastest way to break a site silently.
- CDN purge not flushing LSCWP. When you publish a new post, LSCWP purges the local server cache automatically, but you may need to purge Hostinger CDN or QUIC.cloud from their respective panels.
- Logged-in users seeing cached pages. If admin bars look stale or carts show wrong totals, your cache exclusion rules are wrong. LSCWP's "Do Not Cache" settings need
/cart,/checkout,/my-account, and/wp-adminexcluded for WooCommerce.
Run your baseline tests again after every two or three changes, not at the end. It is easier to back out one bad setting than to debug five at once. When the page is ready to go live, head to the Hostinger setup guide for the launch checklist, then come back here to keep tuning. To get started on a plan that supports CDN and Object Cache without limits, grab a Hostinger Business or Cloud plan.