
Amazon Lightsail is the simplest way to put a real WordPress site on AWS infrastructure. You pick a fixed-price plan, choose the WordPress blueprint, and a few minutes later you have a Linux server running Apache, MySQL and PHP with WordPress already installed. This guide covers the whole job, from an empty AWS account to a live site on your own domain with a free SSL certificate, including the steps most tutorials skip: finding your admin password, pointing a domain, removing the Bitnami banner, and keeping your bill from drifting.
Who AWS Lightsail Is Right For
Lightsail is the fixed-price tier of AWS, and it is the cheapest honest route onto AWS hardware. It suits a single site, or a small handful, run by someone willing to spend a little time in an SSH window. You still own WordPress updates, caching and SSL renewal, so it rewards people who want control and a predictable monthly price. If you would rather never touch a server, the managed route at the end of this guide is a better fit. For how the three AWS options line up on cost and setup, see the AWS WordPress hosting guide; for AWS as a platform overall, the Amazon Web Services review covers when it is worth the complexity.
What You Need Before You Start
Three things make the rest of this quick:
- An AWS account. You can create one at AWS in a few minutes, though you will need a card on file even for the free trial.
- A domain name you control, so you can point it at the server once the site is up.
- About twenty minutes. The first three months on the cheapest Lightsail plan are free, so you can follow along without a bill.
Step 1: Create a Lightsail Instance
Sign in to AWS and open the Lightsail console from the Services menu. On the Instances tab, click Create instance. The first choice is the region: pick the one closest to most of your visitors, because it sets the physical distance every request travels. Moving a site to another region later means a snapshot and a rebuild, so it is worth a moment now.
Step 2: Choose the WordPress Blueprint
Under the platform options, select Linux/Unix, then choose Apps + OS and click the WordPress blueprint. This is a Bitnami image with Apache, MySQL, PHP and WordPress already configured, which is what saves you from building a stack by hand. If you ever want to assemble the stack yourself, an OS-only blueprint such as Ubuntu is there instead, but the WordPress blueprint is the fast path.
Step 3: Pick a Plan and Launch
Lightsail bundles a server, a static-IP allowance, data transfer and DNS into one monthly price. The $3.50 plan is enough to test with and is free for the first three months. For a live site, the $5 or $10 plan gives WordPress the memory it actually needs. Give the instance a name you will recognise later, then click Create instance. It is ready in about a minute.
Step 4: Attach a Static IP
A fresh instance gets a temporary public IP that changes every time the server restarts, which would break your domain. Open the instance, go to the Networking tab, and attach a static IP. It is free for as long as it stays attached to a running instance, and it gives you one fixed address to point your domain at. Do this before you touch DNS.
Step 5: Get Your WordPress Admin Password
WordPress is installed, but the password is sitting on the server. On the instance page, open the Connect tab and click Connect using SSH to open a terminal in your browser. Then read the credentials file:
cat bitnami_credentials
If that file is empty, try sudo cat /home/bitnami/bitnami_credentials. The file prints the WordPress username, usually user, and its password. Copy them, then visit http://your-static-ip/wp-admin and sign in. One snag catches people out: if the browser terminal drops you into a Debian shell as a user called admin and the Bitnami commands return "command not found", you are in the wrong environment. Reconnect as the bitnami user and the paths above will work.
Step 6: Point Your Domain at the Server
With a static IP in hand, send your domain to it. Create an A record for your domain that points at the static IP. You can do this at your registrar, or use the DNS zone built into Lightsail under the Networking area and update your nameservers to match. DNS changes can take anywhere from a few minutes to a few hours to settle, and the SSL step next will fail until they do, so give it time before moving on.
Step 7: Add a Free SSL Certificate
Bitnami ships a tool that installs and auto-renews a free Let's Encrypt certificate, so there is no certificate to buy. Back in the SSH terminal, run:
sudo /opt/bitnami/bncert-tool
The first run offers to update itself. Accept it, then run the same command again. This time it asks for your domain names: enter them separated by a space, both the bare domain and the www version if you use it. Say yes when it offers to redirect HTTP to HTTPS, and give it an email address for renewal notices. If it reports that the domain resolves to a different IP than the machine, your A record has not propagated yet or points somewhere else. Fix the record, wait, and run it again.
Step 8: Remove the Bitnami Banner
Some WordPress blueprints show a small Bitnami badge in the corner of the live site. Load your home page first, because newer images often do not show it at all. If yours does, disable it from the SSH terminal and restart the web server:
sudo /opt/bitnami/apps/wordpress/bnconfig --disable_banner 1
sudo /opt/bitnami/ctlscript.sh restart apache
The badge is gone for good once the server restarts. If the first command reports that the path does not exist, your image uses the newer single-folder layout and the banner is already absent, so there is nothing to remove.
Step 9: Keep Your Bill Under Control
Lightsail's flat price covers a generous data-transfer allowance, but a few habits stop a surprise charge:
- Set a budget and a billing alert in the AWS Billing console on day one. The full walkthrough is in the AWS hosting guide.
- Watch the transfer cap. The lower plans include 1 to 2 TB a month, and going over costs about $0.09 per GB. Serving large images without a cache is the usual culprit.
- Turn on the free CloudFront distribution Lightsail offers. It caches static files at the edge, speeds up far-away visitors, and protects your transfer budget at no extra cost.
- Take a snapshot before any big change. Lightsail has no undo button, and a snapshot is the only way to roll back a broken update.
Make Your Lightsail Site Fast
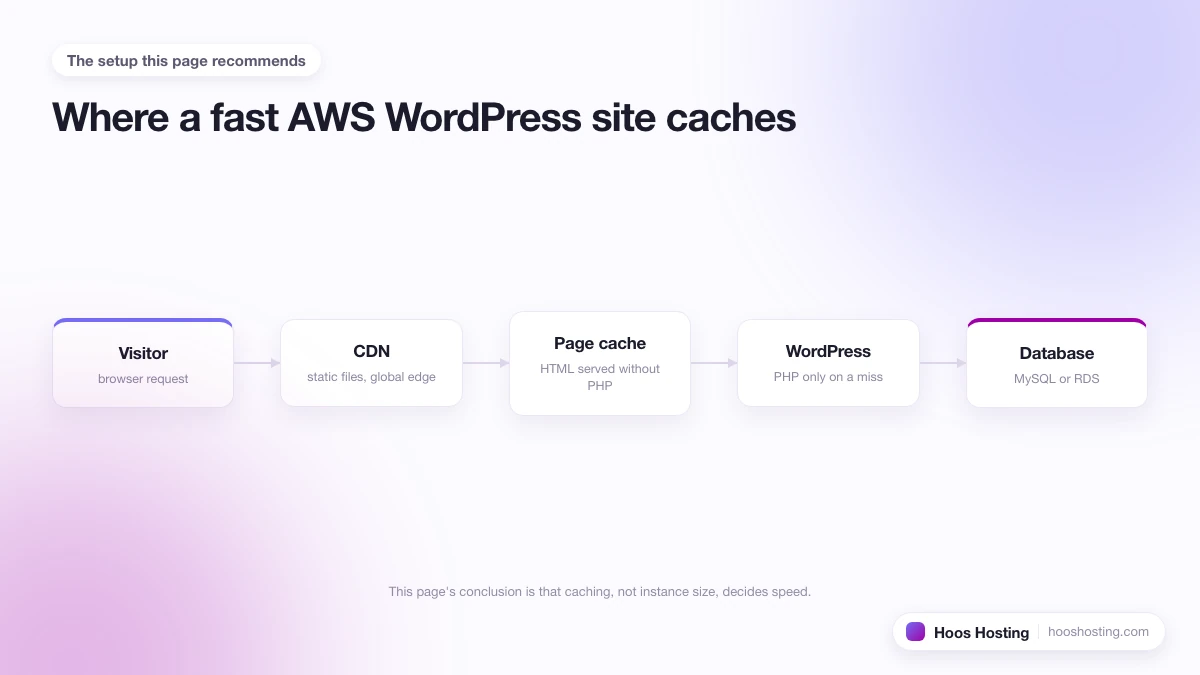
A fresh Bitnami WordPress server runs every page through PHP and MySQL, so an uncached site often answers in 800 milliseconds or more, which search engines count against you. Install a full-page cache plugin and most pages drop well under half a second. Free options such as WP Super Cache or W3 Total Cache do the job, and WP Rocket is the paid plugin that needs the least setup to get there. Pair any of them with the CloudFront distribution from the previous step and far-away visitors get close to the same speed as local ones. Caching is the single biggest change you can make on Lightsail, and it is free to start.
Common Issues and Fixes
The problems that come up on a new Lightsail WordPress site are nearly always one of these:
- The site loads on the IP but not the domain. Your A record is missing or wrong. Point the domain at the static IP and give DNS time to settle.
- bncert-tool says the domain resolves to a different IP. DNS has not propagated or points elsewhere. Confirm the A record matches the static IP, wait, and run the tool again.
- Bitnami commands return "command not found". You are in the wrong shell. Reconnect as the bitnami user rather than the Debian admin user.
- A plugin or theme update broke the site. Restore the snapshot you took before the change. If you skipped the snapshot, that is the lesson for next time.
- The admin login is slow or times out. The instance is low on memory. Move up one plan, which on Lightsail is a snapshot and resize, not a reinstall.
When to Skip the Console and Use Managed AWS
Everything above is a fair amount of server work for one website. If running SSL commands, taking snapshots and watching a billing console is not how you want to spend your time, you can still get AWS hardware without the AWS console. Cloudways runs a managed layer on top of AWS: you pick AWS as the provider and a server size, and it provisions the instance, installs a tuned stack with caching already on, and hands you a dashboard. It costs more per month than raw Lightsail, but it removes every step in this guide. You can start a Cloudways trial and have a WordPress site on AWS running without opening a terminal, and the Cloudways hosting guide explains how the managed layer works.