Cloudways provides a free Let’s Encrypt SSL certificate for every application, which you can enable in a few clicks from the dashboard. You can also install a custom SSL certificate from any certificate authority if your project requires a paid or organisation-validated certificate.
Is there a Free SSL Certificate on Cloudways?
Yes. Cloudways includes free Let’s Encrypt SSL certificates for all applications on every plan.
What the Free Certificate Covers
A Let’s Encrypt certificate issued through Cloudways covers the exact domain you enter during installation. If you add both the root domain (yourdomain.com) and the www version, the certificate covers both. It does not cover wildcard subdomains (*.yourdomain.com). If you need a wildcard certificate, you will need to purchase one from a commercial certificate authority and install it as a custom SSL certificate.
Certificate Validity and Auto-Renewal
Let’s Encrypt certificates are valid for 90 days. Cloudways automatically renews them before they expire, so no manual action is required once the certificate is installed. Renewal typically runs at the 60-day mark to give time to resolve issues if the renewal fails. If auto-renewal cannot complete (usually because the domain is no longer pointing at the server, or DNS is managed elsewhere), Cloudways will send a notification email to the address on the certificate.
Can One SSL Certificate Cover Multiple Applications?
Multi-Application Coverage on a Single Server
A single SSL certificate can cover multiple applications on the same Cloudways server if they share the same IP address. You add each domain to the certificate during installation. However, you cannot have more than one certificate active on a single application. Adding a new SSL certificate to an application replaces any existing certificate on that application.
Wildcard SSL on Cloudways
Cloudways does not issue wildcard certificates (*.yourdomain.com) through its Let’s Encrypt integration. To use a wildcard certificate on Cloudways, purchase one from a commercial certificate authority such as DigiCert, Sectigo, or GlobalSign, generate a CSR through Cloudways, then install the issued certificate files using the Custom SSL option. This is only necessary if you manage many subdomains on the same server and want a single certificate for all of them rather than separate certificates per subdomain.
Generating a CSR for a Custom SSL Certificate
When You Need a CSR
A Certificate Signing Request (CSR) is only needed when installing a commercial certificate: Extended Validation (EV), Organisation Validation (OV), or wildcard certificates from a certificate authority. These types require you to prove domain ownership or organisational identity through a formal verification process. For free Let’s Encrypt SSL, no CSR is needed.
How to Generate a CSR in Cloudways
To generate a CSR, open the SSL Certificate panel for your application (the same panel used to install SSL). Look for the option to generate a CSR and enter the required details: common name (your domain), organisation, city, state, country, and email address. Cloudways generates the CSR file, which you then submit to your chosen certificate authority. Once they issue the certificate, you install it using the Custom SSL tab.
How to Install SSL on Cloudways
Step 1 - Log In
Log into your Cloudways account using your credentials.
Step 2 - Select Your Server
Click Servers in the top navigation bar and select the server that hosts the application you want to secure.

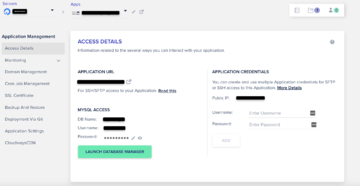
Step 3 - Open Application Management
Inside the server panel, click the www icon on the right side of your application row. This opens the Application Management menu. From there, click SSL Certificate in the left panel.
Step 4 - Choose Your SSL Type and Install
The SSL Certificate panel offers two options. Follow the steps for the one that applies to your situation.
Option A: Free Let’s Encrypt SSL
- Select the Let’s Encrypt tab in the SSL Certificate panel.
- Enter your domain name in the Domain field (for example:
yourdomain.com). If you want the certificate to also cover the www version, add it as a second entry. - Enter your email address. Cloudways uses this to notify you of any renewal issues.
- Click Install Certificate. The process takes one to two minutes. Once complete, your application will show as secured.
Option B: Custom SSL Certificate
- Select the Custom SSL tab in the SSL Certificate panel.
- Paste the full contents of your SSL certificate file (the .crt or .pem file your certificate authority issued) into the Certificate field.
- Paste your private key (generated when you created the CSR) into the Private Key field. The private key must match the certificate exactly.
- If your certificate authority provided an intermediate or chain certificate, paste it into the Certificate Authority (CA) Chain field. Not all CAs require this.
- Click Install Certificate to complete the installation.
Verifying SSL Is Working
Browser Padlock Check
After installing, visit your site at https://yourdomain.com and confirm the browser shows a padlock icon in the address bar. Click the padlock to view the certificate details and check that the domain name and expiry date are correct. If the site still loads over HTTP, you need to set up an HTTPS redirect. See the guide on redirecting HTTP to HTTPS on Cloudways.
Fixing Mixed Content Errors
Mixed content errors appear when a page loads over HTTPS but some embedded resources (images, scripts, or stylesheets) are still referenced with HTTP URLs. The browser blocks or flags these resources, which can break page layout or show a security warning even when the padlock is present.
To fix mixed content on a WordPress site on Cloudways, run a database search-and-replace to update all http://yourdomain.com references to https://yourdomain.com using a plugin such as Better Search Replace. Then clear your Cloudways server cache and any caching plugin cache. If you are using Cloudflare, enabling Automatic HTTPS Rewrites in the Cloudflare dashboard can also catch remaining HTTP references at the edge.
SSL Renewal on Cloudways
Let’s Encrypt Auto-Renewal
Let’s Encrypt certificates auto-renew every 90 days through Cloudways. No manual action is required after the initial installation. Renewal runs approximately 30 days before expiry. If the renewal fails, which typically happens when a domain is no longer pointing at the server or when a CDN is intercepting certificate validation requests, Cloudways sends a notification to the email address on the certificate. Check that the domain A record still points at your Cloudways server IP before the renewal date to avoid failure.
Custom Certificate Manual Renewal
Commercial SSL certificates do not auto-renew through Cloudways. Your certificate authority will send an expiry notice, typically 30 to 60 days before the certificate expires. To renew, generate a new CSR through Cloudways, submit it to your CA, and once the new certificate files are issued, return to the Custom SSL panel and install the replacement. The new certificate replaces the old one without downtime.
SSL on Cloudways Staging Environments
Cloudways staging environments run on a temporary cloudways.com subdomain by default (for example, yourdomain-com.cloudwaysapps.com). These staging URLs do not need SSL installation because they are already covered by the Cloudways platform certificate.
If you have set up a custom staging domain (for example, staging.yourdomain.com), you will need to install SSL on that application separately, following the same steps as for the production application. Make sure the staging subdomain has an A record pointing at the server IP and that DNS has propagated before attempting to install the Let’s Encrypt certificate.
Cloudflare and Cloudways SSL Interaction
If you are using Cloudflare in front of Cloudways, the SSL mode setting in Cloudflare determines how the connection between Cloudflare and your Cloudways server is handled.
- Flexible: Cloudflare connects to your server over plain HTTP. Do not use this if your Cloudways application has SSL installed. It causes redirect loops when Cloudways forces HTTPS while Cloudflare serves requests over HTTP.
- Full: Cloudflare connects to your server over HTTPS but does not verify the certificate. Works with Let’s Encrypt but leaves room for certificate mismatches.
- Full (Strict): Cloudflare connects over HTTPS and verifies that the certificate on your Cloudways server is valid and trusted. This is the correct setting when you have a valid Let’s Encrypt certificate installed on your Cloudways application.
Set SSL mode to Full (Strict) in Cloudflare once you have installed Let’s Encrypt on Cloudways. For step-by-step Cloudflare configuration with Cloudways, see how to use Cloudflare with Cloudways.
Final Word: Installing SSL on Cloudways
If SSL installation fails with a file permission error, you may need to reset your file and folder permissions on Cloudways before retrying.
Installing SSL on Cloudways takes a few clicks whether you use the free Let’s Encrypt option or a custom certificate. For most sites, Let’s Encrypt is the right choice: it is free, covers the domain fully, and renews automatically. Once your SSL certificate is active, redirect all traffic to HTTPS and set Cloudflare to Full (Strict) mode if you are using it. For the broader security context including WAF rules and mixed-content troubleshooting, see our Cloudways security and SSL guide. If you manage DNS through Cloudways, the DNS Made Easy add-on can reduce propagation time with lower TTL settings before SSL installation.