Cloudways is a managed cloud hosting platform that runs WordPress, WooCommerce, and other applications on top of major cloud providers including DigitalOcean, Vultr, AWS, and Google Cloud. The setup process is straightforward but it does involve more than just creating an account. This guide walks through every step from signup through to a live domain pointing at your WordPress site.
Why Use Cloudways?
Cloudways handles the server management layer so you do not have to configure Nginx, PHP, or databases yourself. That is the core appeal compared to going directly to a cloud provider like DigitalOcean or AWS, where you would be starting from a blank server.
Managed Infrastructure Without the Complexity
With a raw cloud provider, you get a virtual machine and nothing else. You are responsible for installing a web server, configuring PHP, setting up a database, and keeping everything patched and secure. Cloudways sits on top of those same providers but handles all of that for you. The underlying infrastructure is still cloud-based, meaning your resources are not shared with other customers the way they are on traditional shared hosting. You get the isolation of cloud without the configuration overhead.
Performance Features Built In
Key performance features include:
- Server-level Varnish caching and Redis available out of the box
- One-click WordPress installs with the Breeze performance plugin included
- Free SSL certificates via Let’s Encrypt, renewed automatically
- Vertical server scaling without data migration
- Team collaboration and staging environments built into the dashboard
For a detailed breakdown of how Cloudways compares to other options, see our Cloudways review. Before picking a server provider, our guide on what hosting supplier to choose on Cloudways covers the performance and pricing differences between DigitalOcean, Vultr, AWS, and others. If you are specifically considering AWS, our Amazon Web Services review covers what to expect.
Try Cloudways Free
Cloudways offers a trial period so you can test the platform without committing to a paid plan from day one. No credit card is required to get started. You get access to the full dashboard, server deployment, and application management during the trial, which gives you enough time to evaluate whether the platform suits your workflow before paying anything.
If something goes wrong during setup or later on, you can check the application logs directly from the Cloudways dashboard before opening a support ticket.
How to Set Up Cloudways: Step by Step
The full setup process covers six steps: creating your account, starting free, completing the signup form, deploying your first server, adding your WordPress application, and connecting your domain.
Step 1 - Go to the Cloudways Website
The first step is to open the Cloudways website. You can sign up for Cloudways using our link.
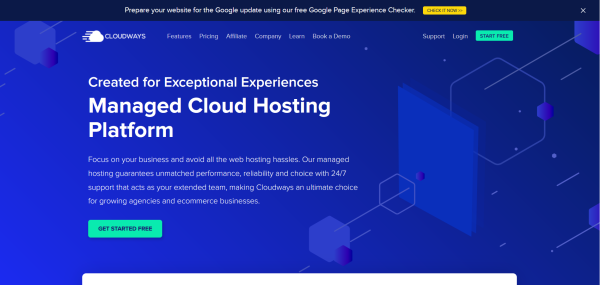
Step 2 - Click Start Free
On the Cloudways homepage you will see a ‘Start Free’ button in the top right corner. Click it to begin the account creation process. This opens the signup form without requiring a credit card upfront.
Step 3 - Complete the Signup Form
Cloudways gives you four ways to create an account: sign in with LinkedIn, GitHub, or Google, or fill in the short registration form manually. The manual form asks for your name, email address, and a password. It takes about two minutes to complete.
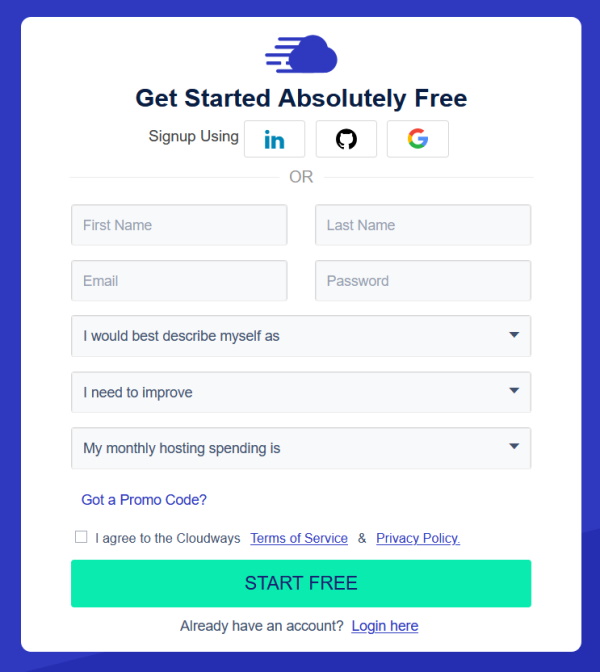
When you have finished, click ‘Start Free’ at the bottom of the form. You will be taken to the Cloudways dashboard and asked to verify your email address.
Step 4 - Deploy Your First Server
After verifying your email, Cloudways will prompt you to launch your first server. This is where you choose the infrastructure your WordPress site will run on.
You have six cloud provider options:
- DigitalOcean - Fast, affordable, and the most popular choice for WordPress sites. Good global coverage with data centers in the US, EU, Asia, and Australia.
- Vultr - Comparable to DigitalOcean in price and performance. Often slightly faster on raw benchmarks.
- Linode (Akamai) - A reliable alternative with competitive pricing.
- AWS - Higher capacity and more regions, but more expensive. Better suited to enterprise workloads.
- Google Cloud - Strong network infrastructure globally. Priced at a premium.
- Cloudflare - Edge-based deployment for latency-sensitive applications.
For a new WordPress site, DigitalOcean or Vultr on the smallest plan (1GB RAM / 1 CPU) is the right starting point. You can scale up later from the Cloudways dashboard without any migration.
Next, choose your server size. The smallest option (1GB RAM) is suitable for a single low-to-medium traffic WordPress site. For WooCommerce or higher traffic, the 2GB plan is a safer start. You can always scale vertically later.
Assign a server label and pick a region. The region should be as close as possible to where the majority of your site visitors are located. Set a server label you will recognise, for example ‘wp-production’.
Click Launch Now. Cloudways will provision your server. This usually takes two to five minutes.
Step 5 - Add Your First Application
After your server is live, you need to add an application to it. Think of the server as the environment and the application as your WordPress install.
Go to Applications > Add Application. Choose WordPress, give it a label and a project name. Cloudways will install WordPress and configure the database automatically.
The setup takes about one to two minutes. Once complete, you will see your application in the dashboard with its temporary URL, something like xxxxxx.cloudwaysapps.com. You can visit this URL immediately to verify WordPress is running.
Step 6 - Connect Your Domain
To point your real domain to your Cloudways application:
- Go to your application and click Domain Management.
- Enter your domain name and click Add Domain.
- Log in to your domain registrar (GoDaddy, Namecheap, etc.) and update the A record to point to your Cloudways server IP address.
- DNS propagation can take up to 48 hours, though usually it completes within a few hours.
Once the domain resolves to your Cloudways server, you can install a free SSL certificate from within the application settings.
Your Cloudways Dashboard: What You’ll See After Login
After you complete signup, you access the platform at cloudways.com/app/#/login. Enter the email and password you registered with, and you land on the main dashboard. If you used Google, GitHub, or LinkedIn to sign up, use the same social login option each time. There is no separate login URL for trial accounts versus paid accounts.
The dashboard has two main areas you will use constantly: the Servers tab and the Applications tab. Both are accessible from the top navigation bar.
Navigating the Servers Tab
The Servers tab lists every server you have deployed. Clicking a server opens its detail view, which covers several areas:
- Server credentials - your master SSH username, IP address, and MySQL root password
- SSH/SFTP access - the connection details for connecting via the command line or an FTP client like FileZilla
- Team access - you can add team members and restrict which servers and applications they can access
- Security settings - including whitelisting IP addresses for SSH
- Packages - switch PHP versions, update MySQL, or install server-level packages
Server actions such as scaling (upgrading RAM and CPU) and cloning are also available here. Scaling is done vertically and takes a few minutes with no data loss.
Navigating the Application Tab
Each application on your server has its own settings panel. From the Applications tab, click any application name to open it. Inside you will find:
- Domain management - add or remove domains and set your primary domain
- SSL certificate - install Let’s Encrypt or upload a custom certificate
- Backups - configure automated backups with a retention period of up to four weeks
- Staging - clone your live application to a staging environment, test changes, then push them live
- Caching - toggle Varnish, Memcached, and Redis at the application level
- Application credentials - your WordPress admin URL, SFTP details, and database name
What the Monitoring Graphs Show
Cloudways includes a built-in monitoring view at the server level. The graphs track CPU usage, RAM consumption, disk usage, and bandwidth over time. You can filter by time range (last hour, last 24 hours, last week) to spot spikes or patterns. If your site slows down unexpectedly, the monitoring view is the first place to check before investigating application logs. High CPU with normal RAM often points to a caching issue or a misbehaving plugin. High RAM with normal CPU can indicate a memory leak or a process that is not terminating correctly.
What to Do After Setup
A few important things to do once your server and application are running:
Enable Daily Backups
Turn on automated daily backups at the application level and set a server snapshot schedule. Cloudways stores backups offsite so they survive even if your server has a problem. See our guide on how to back up an application on Cloudways for step-by-step instructions.
Install Your SSL Certificate
Use the built-in Let’s Encrypt integration to install a free SSL certificate. This is done from the application settings page under the SSL tab. The certificate installs in under a minute and renews automatically before it expires.
Force HTTPS on All Traffic
Once SSL is active, enable the HTTPS redirect so all traffic uses HTTPS from day one. Cloudways has a one-click option for this inside the application settings. See our guide on redirecting HTTP to HTTPS on Cloudways if you want to do it at the WordPress or server config level instead.
Add More Sites If Needed
You can host multiple WordPress sites on one Cloudways server by adding new applications from the same server dashboard, which keeps costs down. Each application gets its own database, SFTP credentials, and settings while sharing the underlying server resources.
Final Word: How to Set Up Cloudways
Cloudways is a solid way to get a WordPress site online with managed infrastructure, sensible default performance settings, and room to grow without switching providers. For a wider look at what Cloudways offers overall, read our Cloudways hosting guide. If you already have a WordPress site to bring over rather than starting fresh, our step-by-step guide on how to migrate WordPress to Cloudways covers both the plugin method and manual SFTP steps.